Building the Thor costume
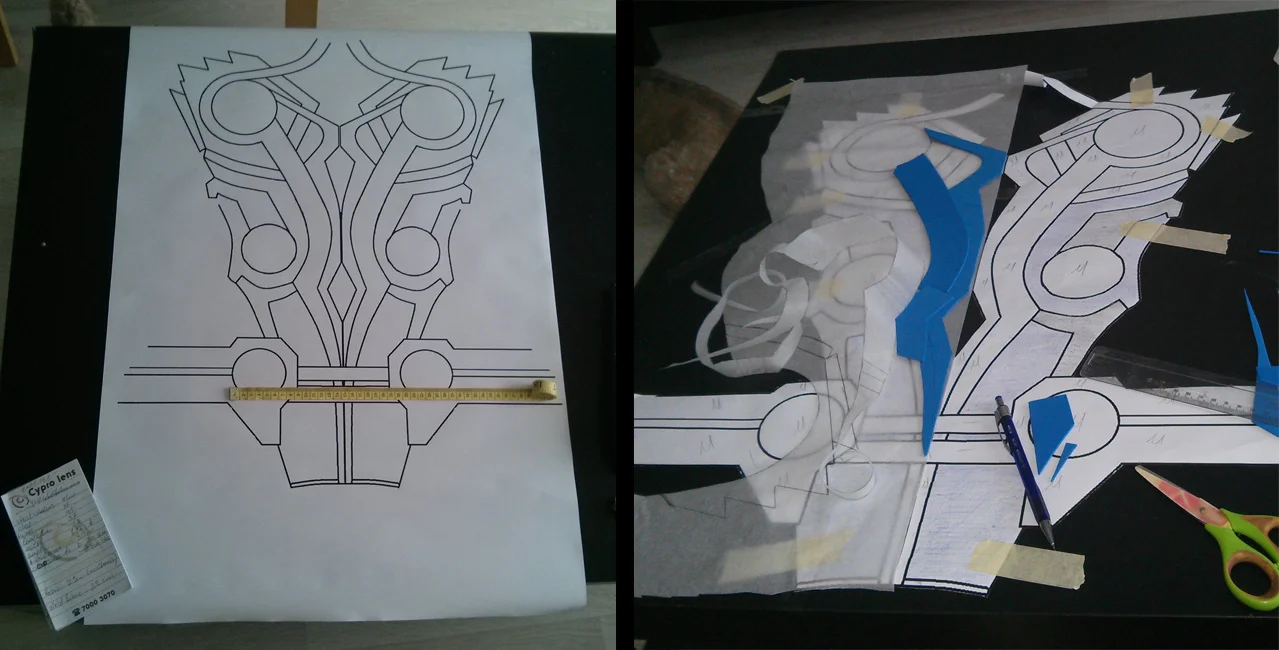
This was the first costume commission for a person who wasn't my size. The most important part here was the measurements. Everything had to be the right size with limited fittings, especially since I couldn't put on the costume and try it. I took the measurements of my "model" and designed the pattern digitally. This actually helped a lot, especially with the proportions and symmetry of the design, since it's very difficult to pull this off with a hand-drawn pattern. I printed it out and started taking notes, on the colours, materials, amount of layers, even further measurements.
The important part is that since I didn't have the model trying the armour on every time I built or added something new, I had to keep my pattern intact and use that as a reference. I traced every piece on baking sheet (because who needs expensive tracing paper) and tried all the armour pieces on the main pattern printout. A flat mannequin!
My favourite part: the construction. The base was made out of EVA foam (10mm). Just cut out the main shape, made shallow cuts and then heated it up. This helped in both sealing (a bit) the surface and making the cuts look more natural (the sharp edges of the cuts were rounded up with the heat). I wasn't going to prime the base because it had to have a leather look. I wanted it to look a bit rough and not smooth and shiny.
The rest of the armour were just layers upon layers. I truly love this part, and the way everything looks so colourful and the exact opposite of the effect I'm trying to achieve. For instance the bracers (not pictured) were a lovely shade of hot pink! Those pieces were made out of craft foam (2mm)
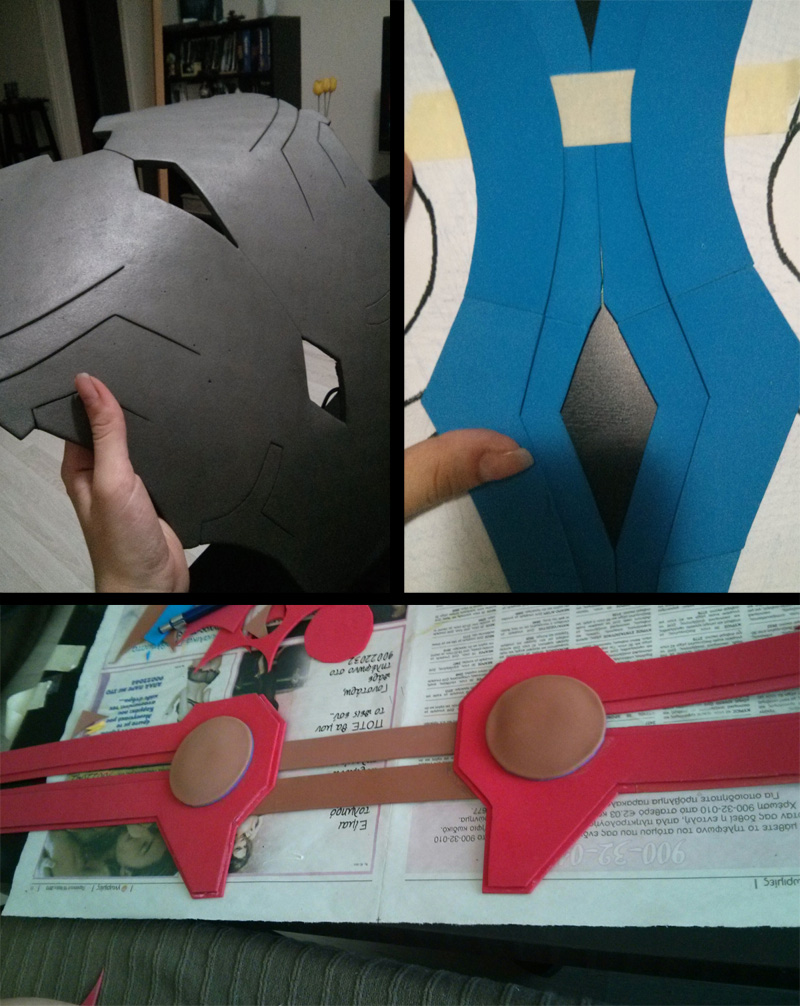
After sealing everything with Gesso (not pictured) and sanded everything to a smooth surface, I sprayed the first layer of colour. Now, there are different types of techniques on painting pieces, but they all follow the same path: base colour (undercoat), main colour, highlights/shadows. Some people choose to start with a light base colour and go darker, I prefer to start with dark undercoat (usually black) and go lighter.
So I started with black spray paint, 2 layers, then just a single layer of the main colour and then the shadows and highlights. Since I used spray paint, I didn't need to varnish the pieces before blackwashing them. What is a blackwash? It's watered down acrylic paint which you apply on the costume and then wipe it down. This gives them a worn-out effect, and it makes the costume look old and used. You don't want your badass armour to look all nice and clean. It has to look as if it's seen some action!

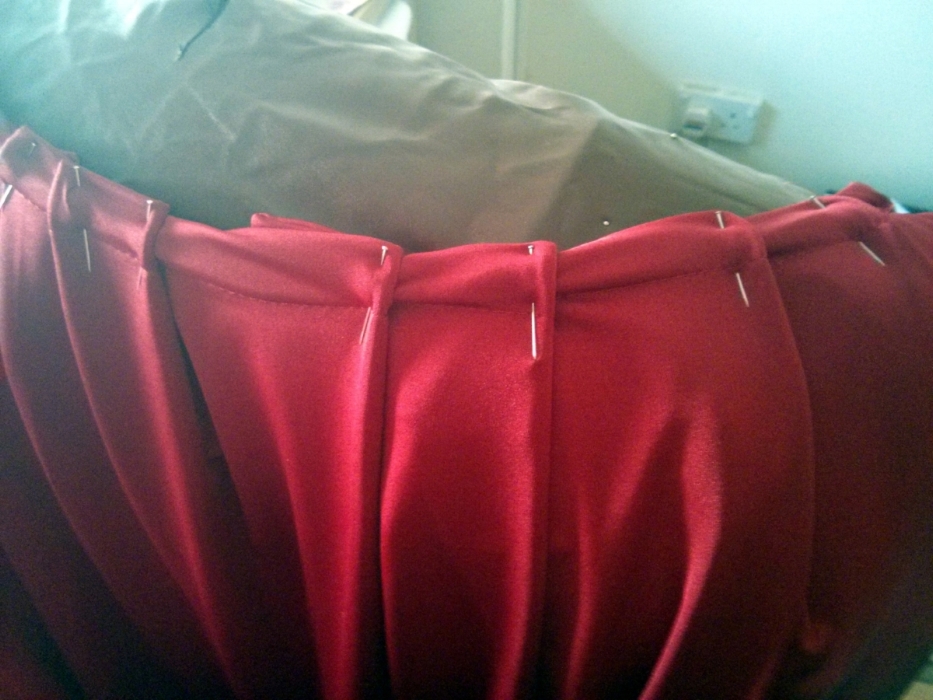
And now my least favourite thing: sewing. It seems that no matter how long I've been sewing, or trying to learn how to sew, a lot of the things I do well with fabric are mostly by accident!
And by accident, I measured, cut and sewed it correctly on my first attempt. It seemed to fit perfectly on my mannequin, but I had to measure the length, cut and hem it, and the person who'd wear it was at least 30 cm taller than I was. So I had to improvise.
Doth thou mother know you weareth her drapes?

And the main difference between a normal and a super villain/hero:
PRESENTATION!

Damn paparazzo!